Posts tagged ‘biophilic crafts’

November 19, 2014

Home Connections: Make Moldable Dough from Stale Bread

by Melissa Harding

DSC_0056

One of our favorite crafts to make during camp is dough. Moldable dough is easy and fun to make with small children; it’s not a scientific recipe, but rather an imprecise collection of ingredient stirred together by little hands. It makes just enough of a mess to keep everyone happy and can turn into some seriously cute crafts. We’ve talked about dough in this space before, but this is an update on a new dough that we are loving that is made with a not-so-secret ingredient: stale bread!

Moldable Stale Bread Dough

You will need: stale white bread, white glue, dishwashing detergent

1. Cut the crust off 7 slices of bread.
2. Break the bread into tiny pieces and put them in a medium-sized bowl.
3. Add 7 teaspoons of white glue and mix thoroughly.
4. Add 1/2 teaspoon of water and 1/2 teaspoon dish washing detergent.
5. Knead your mixture until you get a nice clay consistency. If your mixture is too dry, add a bit more water.

Air drying usually takes about 24 hours.

As always, this is non-toxic, but we do not recommend eating this dough.

 DSC_0033

Imaginative play with dough

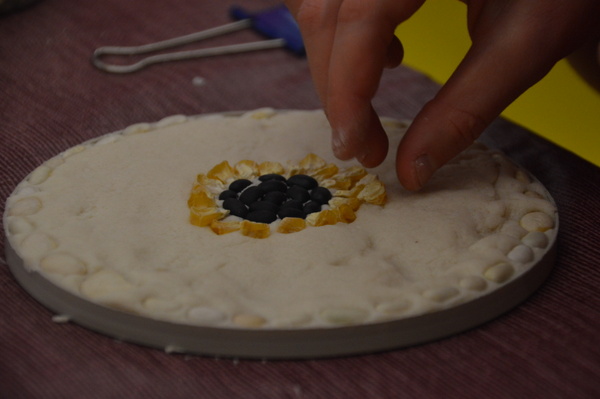
Dough gives children plenty of opportunities for imaginative play. It can be sculpted into many different shapes; our campers especially love to use cookie cutters to create animal shapes. It can also be put into silicon candy molds and shaped ice-cube trays. It is best to use silicon molds, as they can be folded inside out to remove dough. Campers also enjoy using the dough to sculpt “food” and serve it as cookies, cakes and other tea party or kitchen items.

Decorative items like seeds, glitter and plant material can be added to dough to give these sculptures additional life. For example, seeds make great eyes for a snake or beautiful patterns on a decorate stone or pot. The only limit in the imagination!

Here are a few more examples of fun dough recipes and play ideas:

Snowdough, The Imagination Tree
Moldable Sand, The Imagination Tree
Gold Cloud Dough, The Imagination Tree
The A-Z of Playdough Recipes and Activities, The Imagination Tree
Beaded Salt Dough Ornaments, Mommy-Labs
Gingerbread Salt Dough, Gemma Garner
39 Ways to Play and Learn with Playdough, The Artful Parent

To learn how we make playdough and salt dough, check out this post.

The above photos were taken by Science Education staff and volunteers.

November 20, 2013

Home Connections: Creating a Seed Mosaic

by Melissa Harding

DSC_0268

As the weather gets colder, it can be easier to feel disconnected from nature. It is hard to want to garden, play catch or go for a walk when the wind is biting at your back. Luckily, there are many ways to foster a connection with nature in the winter without becoming a popsicle. One such way is to create natural art; there are many natural items from the backyard and the pantry that can be turned into art – seeds and beans, seed pods, dead flowers, berries, pine cones and fallen leaves. These are the perfect materials for one of our favorite art forms: mosaics. Mosaics are like puzzles. They are art pieces that have been created out of many small pieces put together to make a bigger picture. While you can make a mosaic out of anything, natural materials create a beautiful piece that is truly biophilic.

We make our mosaics out of salt dough and seeds. Salt dough is easy to assemble out of materials from the pantry and dries nicely. Seeds are readily available in a variety of places; they can be found outside, in seed packets, in soup mixes and in bags from the store. We like to use a combination of lentil soup mix and seed packets, coupled with nature finds that our students get from the outdoor gardens.

DSC_0270

There are many recipes for salt dough, but this is our favorite:
Ingredients: 1 cup salt 2 cups all-purpose flour 1 cup luke warm water

Instructions: In a large bowl mix salt and flour, gradually stirring in water until it forms a dough-like consistency. Form a ball with your dough and knead it for at least 5 minutes with your hands, adding flour as needed to create a smooth texture. The longer you knead your dough, the smoother it will be. Salt dough is as salty as its name suggests, and is best kept away from pets and very small children, as the high salt content may make them sick if they ingest enough.

Want to add more color to your salt dough? Try these ideas: 1. Add powdered tempera paint to your flour, 2. add food coloring or paint to the water before you mix it with the salt/flour, or 3. add natural coloring like instant coffee, cocoa, or curry powder.

DSC_0249

Turning these items into a seed mosaic is simple:
1. Flatten the salt dough into the desired shape. Use cookie cutters to create smaller shapes or trim your dough into a free-form shape with a butter knife. (Hint: Filling an empty round lid is a sure way to get a perfect circle)
2. Draw a practice pattern on a piece of paper or lightly sketch it onto the salt dough with a toothpick; this will give you something to look at as you place your seeds.
3. Place your seeds to create a picture or pattern on the salt dough. Be sure to press them firmly into the dough. Cover as much of the salt dough as you like; the more seeds, the more colorful it will look!
4. Leave your mosaic to dry overnight. If making smaller shapes for hanging, be sure to punch a hole in the top of your shape with a pencil before letting the piece dry. While these mosaics are hard once they are dry, they are not suitable for being outdoors.

Once you have tried this fun craft with seeds, add other small natural items from your backyard or change up the color of your salt dough. This is also a great chance to explore a local park or green space to look for mosaic items.  The sky is the limit with this craft, so head outside and get crafting today!

To learn more ways to use salt dough, as well as other doughs that we use in our programs, check out this post. 

Check out this post to learn how art can foster a connection with nature.

The above photos were taken by Lisa Xu.